 Google Übersetzer
Ensure you have Microsoft Visual Studio 2010 installed before you install the CUDA toolkit, if you have already installed the CUDA toolkit and have not yet installed Visual Studio then un-install it before continuing (not doing so will result in Visual Studio integration not functioning!)
Step 1: Setup your Environment
1. Install Microsoft Visual C++ 2010 (you can download Microsoft Visual C++ 2010 Express for free from http://www.microsoft.com/visualstudio/en-us/products/2010-editions/visual-cpp-express).
2. Install the latest Nvidia driver from http://www.nvidia.com/page/home.html
3. Install CUDA toolkit and CUDA SDK from here http://developer.nvidia.com/cuda-downloads
Step 2: Test your Environment:
The best way to do this is to run an existing Nvidia sample project.
1. build and run one of the sample project that come with the SDK (if the default installation path was used then these are located in C:\ProgramData\NVIDIA Corporation\NVIDIA GPU Computing SDK 4.0\C\src, deviceQuery is a good sample to run)
2. if you get get the error: “The result “” of evaluating the value “$(CudaBuildTasksPath)” of the “AssemblyFile” attribute in element
Then download the bug fix from the nvidia website, found here:
http://developer.download.nvidia.com/compute/cuda/4_0/BuildCustomizationUpdate/CUDA4_0BuildCustomizationFix.zip
Step 3: Create your own CUDA Project
1. Open Microsoft Visual C++ 2010
2. Create a new empty project: file->new->project, select win32 console application. Ensure to select empty project see screenshot below: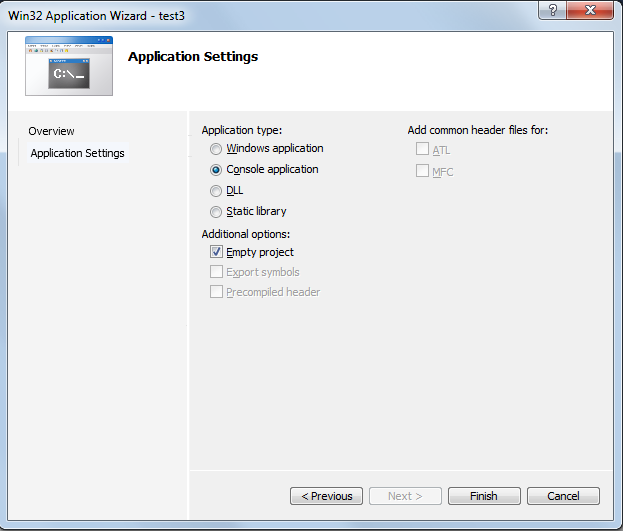
3. Right click on the source files folder and create a new cpp file (add->new item)
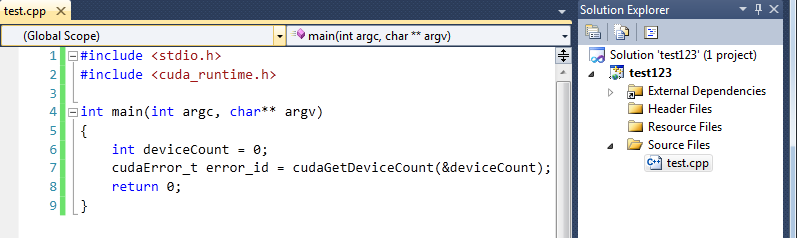
4. Add a main function and Add #include
The include and line of code will be underlined in red because the project cannot find the .h file. So your cpp should now look like this:
5. We now need to get rid of those compile errors from the previous step. Rename the .cpp file to .cu
6.Now the included .h file and the call to the CUDA function should no longer give compile errors. To get syntax highlighting working for .cu files. tools->options->text editor->file extension type .cu in input box, click add press ok and restart Visual Studio.
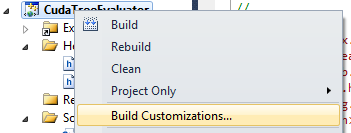
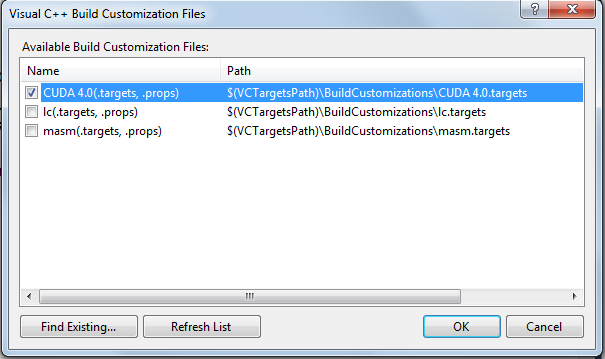
7. If you now compile the project you will get compile errors, “LNK” errors, To fix this. Right click on the project, Build Customizations, Tick the CUDA check box and click ok.
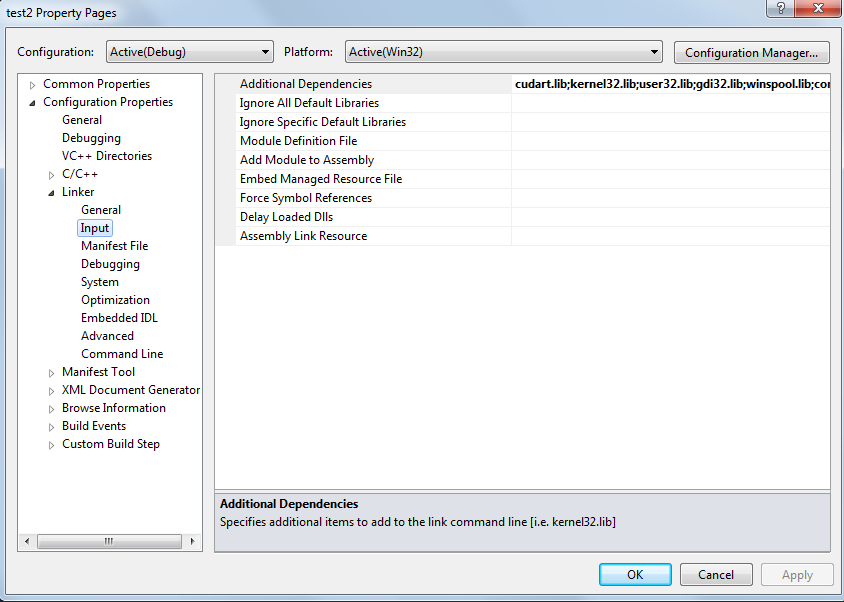
8. If you compile you will still get compile errors, we need to add the path to the CUDA libraries to fix these issues, to do this: right click the project, properties -> configuration properties -> linker -> input, add cudart.lib; to Additional Dependencies
9. You will now be able to compile and run your application within visual studio. But, there is another issue we need to resolve. If you go look in the output directory (release/debug) you will see that a .exe was not generated, there is only a .obj file and some other files. To fix this, right click on the .cu file you created click properties. Selected General and set the item type to CUDA C/C++ (see pic below)

(this will also update the project properties menu to show CUDA specific information).
Your project should now compile and run.
Share

© stevenmarkford.com 2017